Dental Implant Installation Steps: A Step-by-Step Guide
Dental Implant Installation Steps: A Step-by-Step Guide
Description:
A dental implant installation is a complex process that consists of several stages. Knowing these stages will help the patient prepare for the procedure and understand what to expect. In this article, we will look at the step-by-step process of dental implantation.
Dental Implant Installation Steps:
1. Consultation and Diagnosis: At the first stage, the doctor conducts an oral examination, collects a medical history, and orders the necessary examinations, such as an X-ray or CT scan. This allows you to assess the condition of the bone tissue and develop an individual treatment plan.
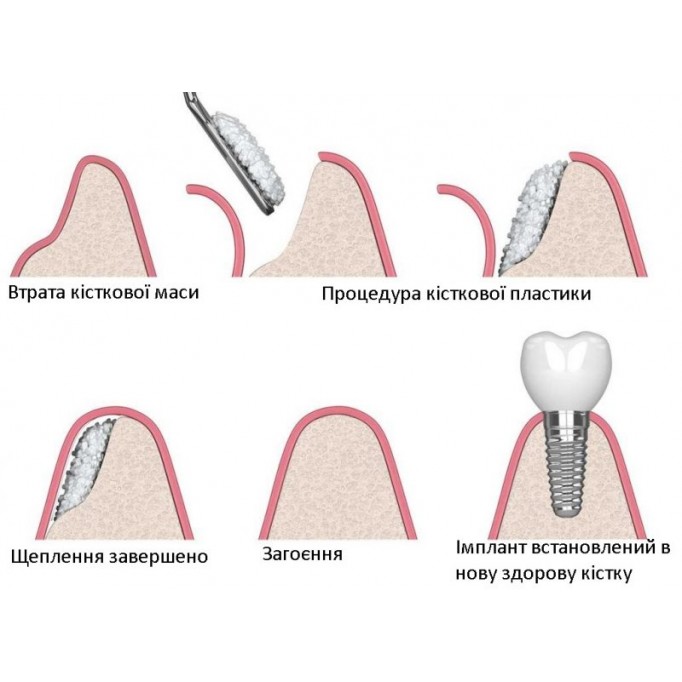
2. Surgery Planning: After the diagnosis, the doctor draws up a procedure plan. Includes the choice of implant type, the need for additional procedures (for example, bone augmentation), and the timing.
3. Implant Installation: At this stage, surgery is performed. Under local anesthesia, the doctor makes an incision in the gum, creates an opening in the bone, and installs the implant. The gum is then closed, and the implant is left under the tissue to integrate with the bone.
4. Healing time: After the implant is placed, the patient needs time to heal. This process can last from several months to six months, depending on the type of implant and the individual characteristics of the body. During this period, it is important to follow the doctor’s recommendations.
5. Abutment placement: When the implant has fully fused with the bone, the doctor performs a second surgery to place the abutment, the element that connects the implant to the crown. This stage may include additional procedures to correct the formation of the gums.
6. Crown fabrication and placement: After the abutment is placed, impressions are taken to make the crown. The crown can be made of various materials, such as ceramic or composite. Once the crown is made, the doctor places it on the abutment, completing the implantation process.


Dental implantation is a complex of surgical and orthopedic manipulations aimed at replacing a missing tooth with its analogue - an implant. At the same time, adjacent teeth are no..